


Setting up Email on Microsoft Outlook 2011
Setup your email account in Microsoft Outlook 2011
The following instructions describe in detail how to create and setup your email account when using Microsoft Outlook 2011. The instructions included here are easy to follow and can be used for setting up emails (mail servers) provided also by other web-hosting providers.
1. From Start choose Microsoft Office Outlook 2011 (it is assumed that you have used this program before so as the Internet Connection Wizard is not initiated).
2. Then go to File > Add Account
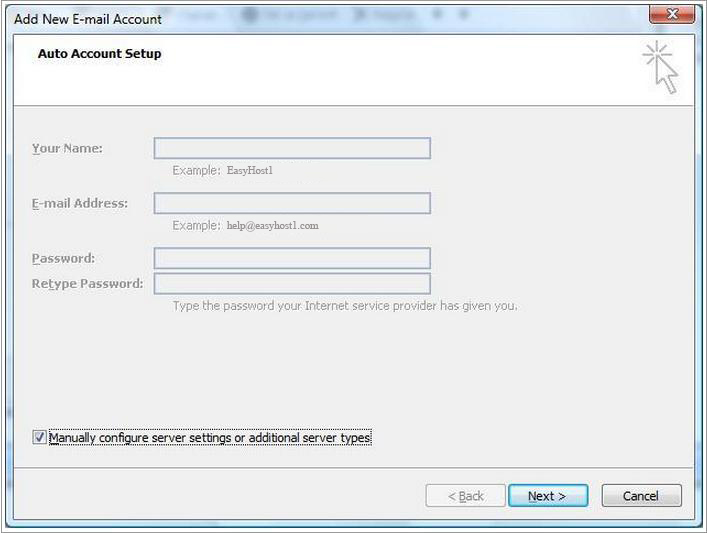
3. At the bottom, select Manually configure server settings or additional server types, and then click Next.
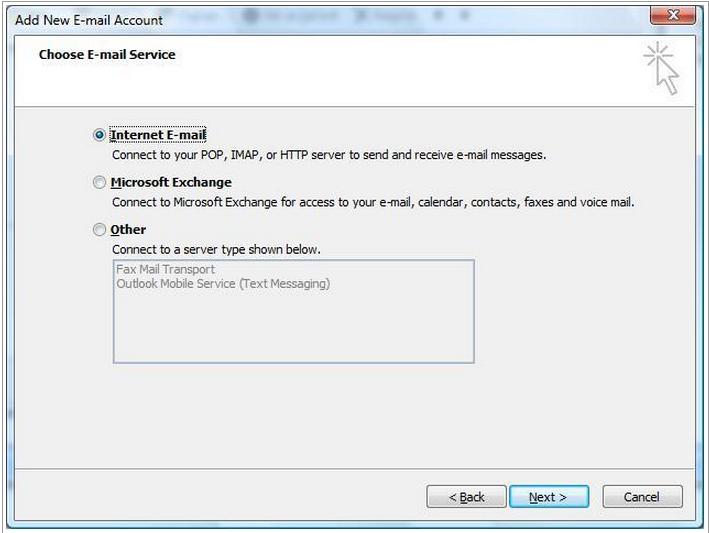
4. Select Internet Email, and click Next.
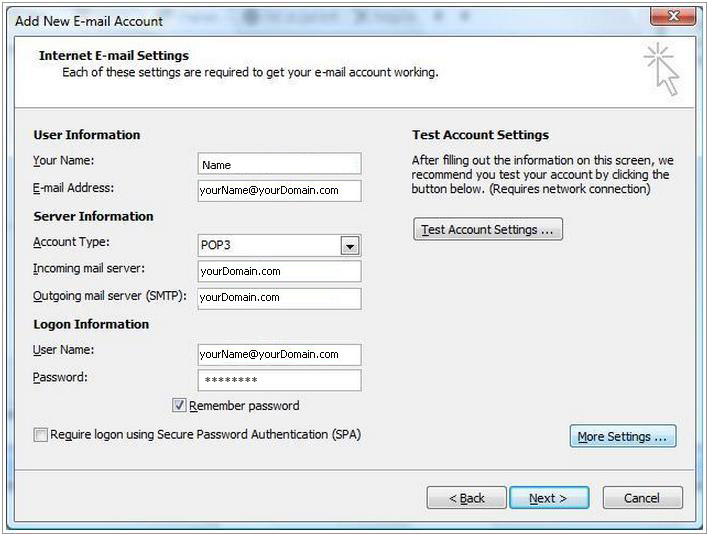
5. On the next window Internet E-mail Settings you are required to complete various fields related with your personal data, server and logon information:
• Your Name
Enter your name, your nick name, or your company’s name depending on how you want to be displayed when you sent an email.
• E-mail Address
Enter your e-mail address (in the example we are creating an email account for an imaginary email: yourName@yourDomain.com).
• Account Type
Should be POP3 (this is the default option).
• Incoming mail server
Your incoming server is yourDomain.com, where “yourDomain.com“ is the name of your domain.
• Outgoing mail server (SMTP)
Your outgoing server is yourDomain.com, where “yourDomain.com“ is the name of your domain.
• User Name
The email address you have been given.
• Password
The password is case sensitive. Decide if you want to check the "Remember password" field.
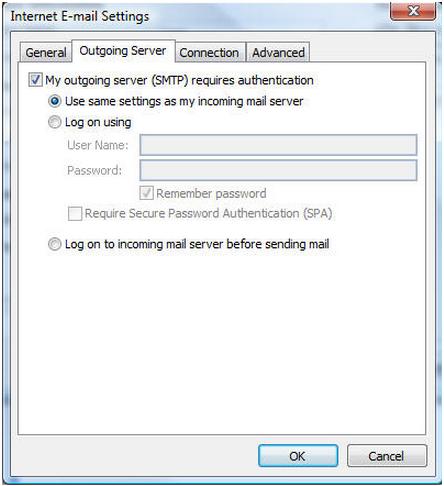
6. Outgoing Server
Put a checkmark in 'My outgoing server (SMTP) requires authentication' and make sure that the dot is in 'Use same settings as my incoming mail server'.
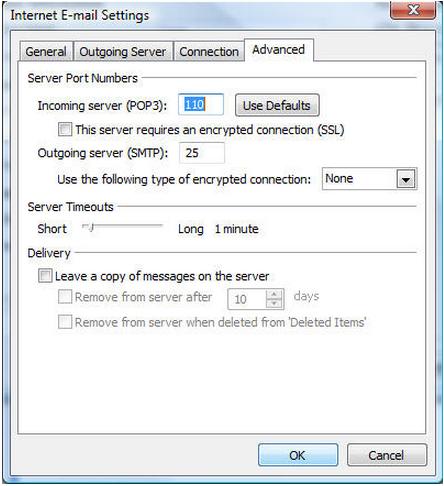
7. Advanced
Click on the 'Advanced' tab at the top.
Make sure that your settings look like the settings shown in this screenshot.
8. Outlook 2011 will test your settings. When it's done, click Close.
.jpg)
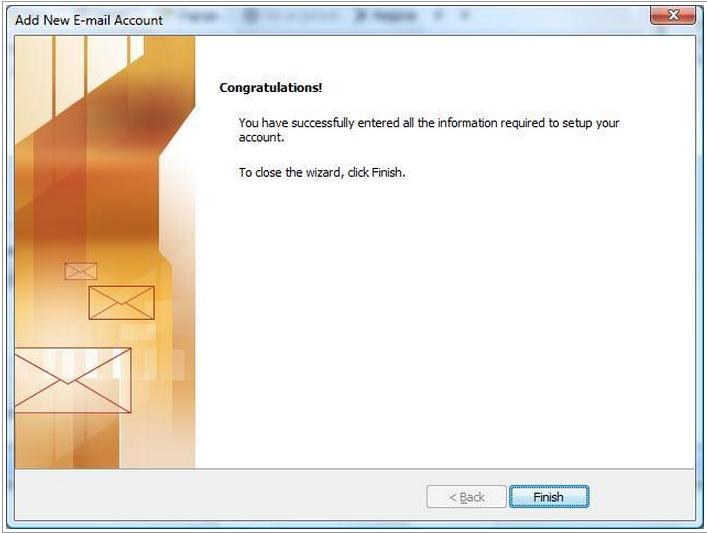
9. The process is completed when you click Finish.